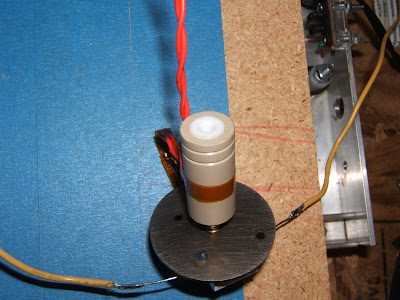
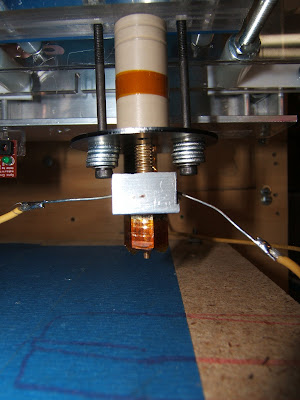
So here we go, I've finally got some pictures up. First is my extruder.
I was previously using nichrome wire as the heating element, but it can be a pain when rebuilding the hot end. To make the heating block I simply used a small scrap of aluminum, and drilled two 3/16" holes perpendicular to each other. I tapped the hole that goes through the thinner thickness with an M6 tap to screw the heater barrel into. The recommended hole size for a M6 tap is 5 mm, but I found that with a 3/16" hole the threads grip the barrel better with less of a gap. I just had to back out the tap a few times to clear the shavings. The resistor I used for heating was mentioned in my last post, p/n
CWC-5.0RCT-ND. I wrapped it in aluminum foil and shoved it in the hole. I am using a standard 3mm 100k thermistor.
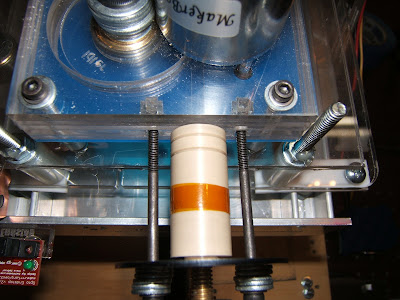
In the picture above you can see the PEEK/PTFE hybrid insulator. I had issues with the stock MakerBot PTFE insulator so I decided to go with this. The PTFE is normally held in with a snap ring, but I was unable to get a good seal between the heater barrel and the PTFE without pushing the snap ring out. So I decided to just do without the snap ring and tighten the barrel in until the PTFE stuck out a bit over the top of the PEEK. Then I tightened it to the extruder to hold it in. This way if the PTFE expands, it will only seal better against the barrel.
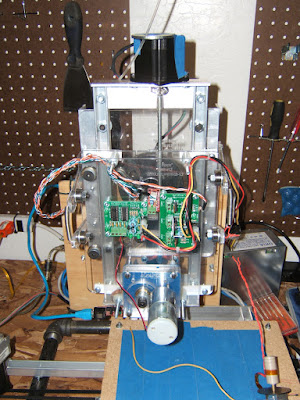
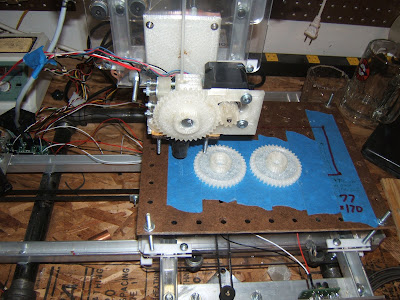
Here is my overall 'bot. As you can see I'm using a MakerBot MK4 extruder.
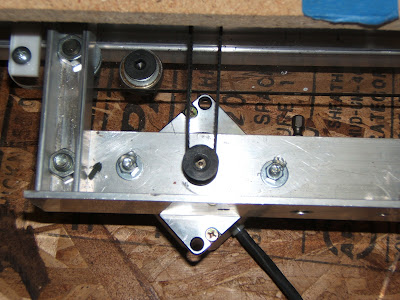
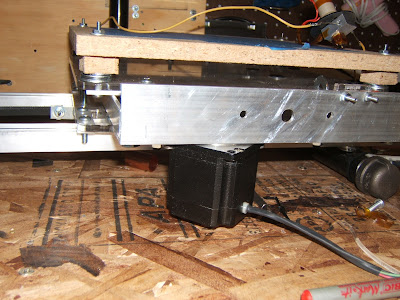
The four pictures above show the belt drive I use. The screw drive that the McWire usually uses is just too slow to be useful. I bought the pulleys and belt from SDP/SI. For the idler pulleys I simply used nylon spacers with a couple nuts on each side.
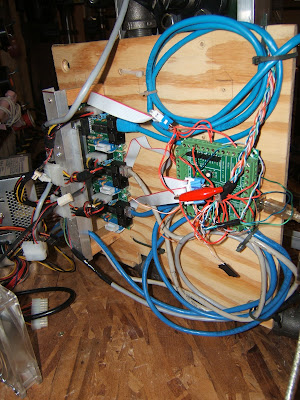
Here you can see the electronics set-up. I am using Gen 2 electronics. Eventually I plan on upgrading to an Arduino Mega with Pololu stepper drivers. For now this is working well, however.
|
I decided to do away with the weak acrylic retaining piece and bolt the hot end directly to the extruder.
Any questions please ask!

 The hot end is their 0.35mm nozzle, V3 hybrid hot end. I have been using it for a couple months now with great success. I print with 0.25mm layers which gives great resolution, comparable to commercial machines which usually print around 0.2mm layers. The small fan you see behind the hot end is to cool the PEEK thermal barrier, without it my PLA extruder gets too warm and starts to warp.